How to protect a PDF document with a password in Power Automate

This Power Automate flow is based in one of our customers, a medical laboratory in Europe, used to inform Covid-19 PCR test results to the national health authority. The lab’s PDF reports contain sensitive information, and the health authority recommends them to be sent encrypted, which they do using PDF Blocks’ Add Password action.
The lab’s flow is triggered when a custom-built ERP generates the reports in PDF, which are then encrypted with the PDF Blocks’ Add Password action and posted to a secure FTP server. They use PDF Blocks’ European endpoint eu.api.pdfblocks.com to force the processing of the reports to be carried out on servers located within the European Union.
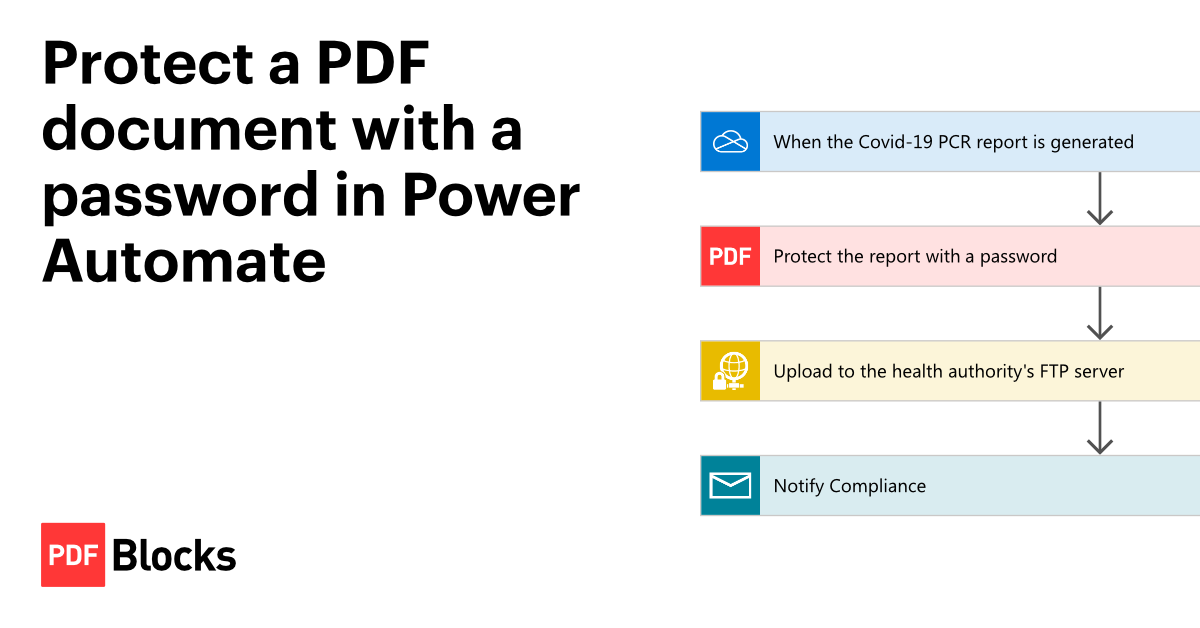
The flow
We will build the following Power Automate flow.
The steps
- Get the PDF file from OneDrive
- Encrypt the PDF with a password with PDF Blocks
- Upload the encrypted PDF to a FTP server
- Email the encrypted PDF
Step 1: Get the PDF file from OneDrive
For this example, we replaced the original flow’s custom HTTP trigger with the When a file is created trigger in OneDrive for Business connector for Power Automate.
- In Folder, select the folder in OneDrive to watch for new documents. In this example, we use PCR Reports.
Step 2: Encrypt the PDF with a password
Use PDF Blocks’ Add Password action to protect the PDF report with a password. If this is your first time using PDF Blocks, sign up for a 14-day trial and create a connection.
- In File Content, add the File content output of the trigger When the Covid-19 PCR report is generated.
- In Password, write the password string to decrypt and open the PDF document.
The characters in a PDF password must be in the ASCII printable range (between positions 32 and 126). This range includes both lower and uppercase letters, numbers, space, and some commonly used symbols, such as: . , : ; # $ % & ( ) * + = ? !
Step 3: Upload the encrypted PDF
Use the SFTP-SSH connector for Power Automate to transfer files to an FTP server via a secure SSH connection. The first time you use this connector, Power Automate will ask for the server address, the username, and password to set up a connection. Then use the Create file action to upload a file to the server.
- In Folder path, enter the folder where you want to upload the encrypted report. In this example we use /pcr_reports
- In File name, write the file name you want to use for the encrypted report. In this example we use the original file name, so we choose the File name output from the When the Covid-19 PCR report is generated trigger.
- In File content, use the Password Protected PDF File Content output from the Protect the report with a password action, which is the encrypted PDF report.
Step 4: Email the encrypted PDF
To notify our compliance department each time a report is encrypted and uploaded to the health authority, use the Send an email notification in the Mail connector. You can also use Outlook, Gmail, or any other email provider with a Power Automate connector.
- In To, write the recipient’s email. In this example, we use compliance@example.com.
- in Subject, write the subject for the email. In this example, we use PCR report delivery notification.
- In Body, write the text content of the email. In this example, we use Report (File name) delivered to the health authority where (File name) is the File name output of the When the Covid-19 PCR report is generated trigger.
To add the encrypted report as an attachment, click Show advanced options and add the Password Protected PDF File Content to the Attachment field and the trigger’s File name to the Attachment file name field.
Test your flow
To test the flow, just upload a PDF document to the /PCR Reports folder in OneDrive.
After the flow runs check that:
- An encrypted copy of the PDF report exists in the /pcr_reports folder in the FTP server. Only people with the password secure_pa$$word can open the report and read its content. People without the password can’t open the file.
- A confirmation email is received in compliance@example.com.
